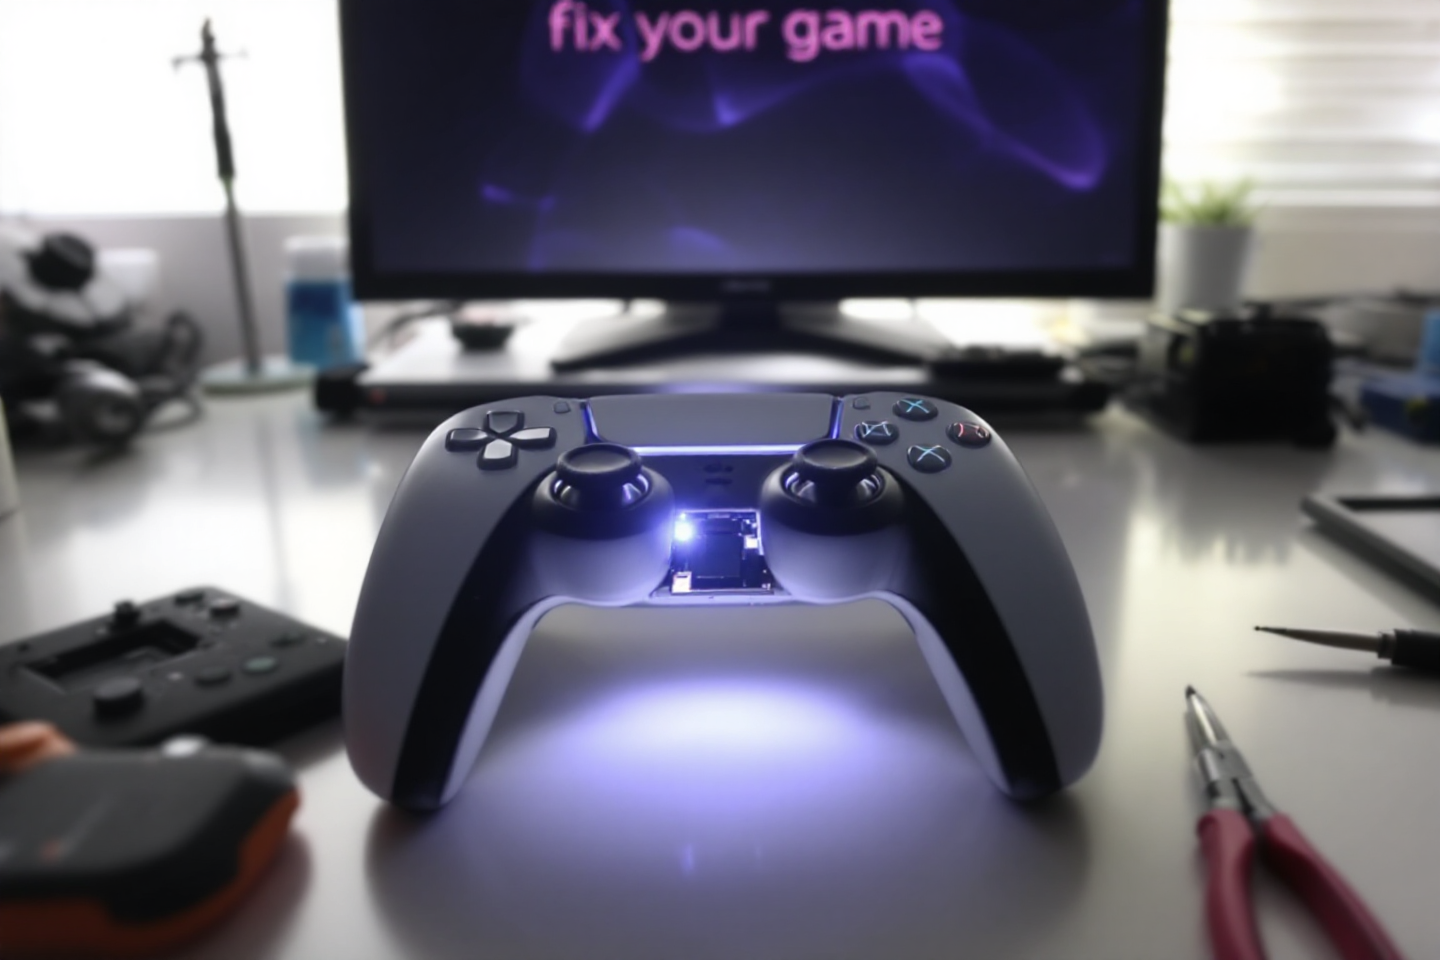
Top PS5 Pro Controller Joystick Replacement Tips You Need to Know
If you’re tired of your PS5 controller acting up, you’re not alone. Many gamers face issues like joystick drift or unresponsive buttons. Luckily, replacing the joystick on your PS5 Pro controller isn’t as daunting as it seems. With a little guidance and the right tools, you can get your controller back in shape and enjoy your gaming sessions without interruptions. This ultimate guide will walk you through everything you need to know about PS5 pro controller joystick replacement, from understanding your controller to testing it after repairs.
Key Takeaways
- Know the parts of your PS5 controller to troubleshoot effectively.
- Gather the right tools and understand warranty risks before starting repairs.
- Identify joystick issues like drift to determine if replacement is necessary.
- Follow a step-by-step approach for disassembly and reassembly of your controller.
- Test your controller thoroughly after repairs to ensure everything works as it should.
Understanding Your PS5 Controller
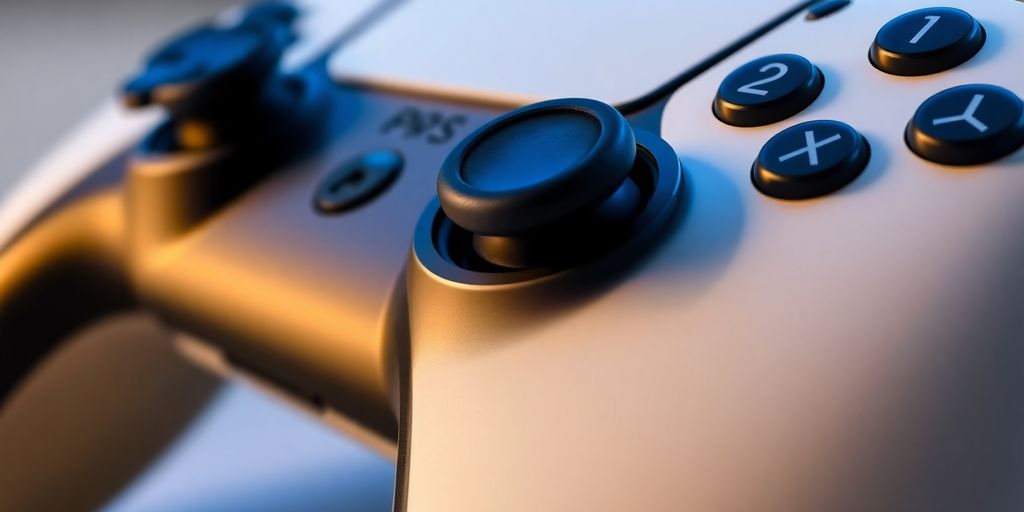
Parts of the PS5 DualSense Controller
The PS5 DualSense controller is more than just a way to interact with your games; it’s a piece of tech packed with features. Let’s break down the main components:
- Buttons: Face buttons (Triangle, Circle, X, Square), shoulder buttons (L1/R1), trigger buttons (L2/R2), D-pad, Options, Share (Create), and the PlayStation button.
- Joysticks: Two analog sticks for movement and camera control.
- Touchpad: A clickable touchpad for additional input methods.
- Light Bar: An LED that can display various colors to indicate player number or in-game events.
- Internal Components: This includes the circuit board, battery, haptic feedback motors, and adaptive trigger mechanisms.
The DualSense controller’s internal design is complex, with multiple ribbon cables and connectors. It’s important to be careful when disassembling it to avoid damaging any components.
Common Issues with PS5 Controllers
Like any piece of hardware, the PS5 DualSense controller can experience problems over time. Here are some of the most common issues:
- Joystick drift, where the character moves on its own without player input.
- Button unresponsiveness or sticking.
- Trigger issues, such as triggers not registering input or getting stuck.
- Battery life problems, including the controller not holding a charge or draining quickly.
- Connectivity issues, where the controller disconnects from the console or has trouble pairing.
These problems can be frustrating, but many can be fixed with some basic troubleshooting or component replacement. If you are having connectivity issues, you might want to check your PS5 Pro upgrade.
How the Joystick Works
Understanding how the joystick works can help you diagnose and fix issues. The joystick module is an analog device that translates physical movement into electrical signals. Here’s a simplified explanation:
- Potentiometers: The joystick module contains two potentiometers, one for the X-axis (left/right) and one for the Y-axis (up/down).
- Movement: When you move the joystick, it changes the resistance in the potentiometers.
- Signal Transmission: These changes in resistance are converted into voltage signals that are sent to the controller’s circuit board.
- Interpretation: The circuit board interprets these signals and translates them into in-game movement.
Joystick drift often occurs when the potentiometers become worn or dirty, causing inaccurate readings. Replacing the joystick modules can often resolve this issue.
Before You Start the Repair
Okay, so you’re ready to get your hands dirty and fix that PS5 controller. Awesome! But hold up a sec. Before you go all in, there are a few things we need to cover to make sure you don’t end up making things worse. Trust me, a little prep can save you a lot of headaches later.
Gathering Necessary Tools
Alright, first things first: you gotta have the right tools. Imagine trying to build a house with just a hammer – not gonna work, right? Same goes for controller repair. Here’s a list of what you’ll probably need:
- A good screwdriver set: Make sure it includes both Phillips head and Tri-wing screwdrivers. That Tri-wing is essential for getting into the controller without stripping the screws.
- A plastic opening tool or spudger: These are great for prying things open without scratching or damaging the plastic. A guitar pick can also work in a pinch.
- Small containers or a magnetic mat: You’ll be taking out a lot of tiny screws, and you do not want to lose them. Trust me on this one.
- Cotton swabs and rubbing alcohol: For cleaning any gunk or grime you find inside. Nobody wants to touch a sticky controller.
- Replacement parts: Obviously, if you know what’s broken, have the replacement ready to go. For example, if you’re fixing drifting joysticks, make sure you have new joystick modules.
Safety Precautions
Safety first, kids! We don’t want anyone getting hurt or frying their controller. Here are some basic rules to live by:
- Always disconnect the controller from any power source before you start. This seems obvious, but it’s worth repeating.
- Work in a well-lit area. You need to see what you’re doing, and squinting at tiny parts is a recipe for disaster.
- Ground yourself. Static electricity can damage electronic components. Touch a metal object before you start working to discharge any static.
- Take your time. Rushing things is how mistakes happen. If you’re not sure about something, stop and do some research.
It’s a good idea to wear an anti-static wrist strap. They’re cheap and can save you from accidentally frying your controller with static electricity. Also, don’t work on a carpeted surface, as carpets tend to generate static.
Understanding Warranty Implications
Before you even think about cracking open your controller, you need to consider the warranty. Here’s the deal:
- Opening your PS5 controller almost certainly voids the warranty. Sony isn’t going to cover damage if you’ve been tinkering inside.
- If your controller is still under warranty and you’re having problems, your best bet is to contact Sony support. They might be able to repair or replace it for free.
- If the warranty is already up, or you’re comfortable voiding it, then go ahead and proceed with the repair. Just know what you’re getting into.
Troubleshooting the Problem
Before you even think about tearing into your PS5 controller, let’s figure out what’s actually wrong. Is it a simple fix, or are you looking at a full-blown replacement? Here’s how to diagnose those pesky issues.
Identifying Symptoms of Joystick Issues
Okay, so your joystick is acting up. But how do you know if it’s really a problem? The most obvious sign is joystick drift, where your character moves on-screen without you even touching the stick. Other indicators include:
- Inconsistent input response: Sometimes it works, sometimes it doesn’t.
- Difficulty aiming or moving precisely: Your movements feel jerky or inaccurate.
- Camera panning unexpectedly: The view drifts even when you’re not touching the stick.
It’s easy to jump to conclusions, but take a moment to really observe what’s happening. Is it a constant drift, or does it only happen in certain games? Does it get better or worse over time? The more information you gather, the easier it will be to pinpoint the problem.
Basic Troubleshooting Steps
Alright, you’ve identified some symptoms. Now what? Let’s try some basic fixes before we get drastic. Here’s a checklist:
- Restart your PS5: Seriously, sometimes it’s that simple. A quick reboot can clear up software glitches that might be affecting the controller.
- Check your controller settings: Make sure your stick sensitivity and dead zones are set correctly. You might have accidentally changed them without realizing it.
- Clean the joystick: Dust and debris can get lodged in the mechanism, causing all sorts of problems. Use compressed air to blow out any gunk.
When to Consider Replacement
So, you’ve tried everything, and the joystick is still wonky. When do you throw in the towel and admit defeat? Here are some signs that it’s time for a replacement:
- The joystick is physically damaged: If the stick is broken, cracked, or loose, it’s probably beyond repair.
- The drift is severe and persistent: If the stick drifts constantly, even after cleaning and adjusting settings, it’s likely a hardware issue.
- You’ve already tried replacing the joystick module: If you’ve gone down the repair route and it didn’t work, it’s time to cut your losses.
| Symptom | Possible Cause | Solution |
|---|---|---|
| Minor Drift | Dust or debris | Cleaning with compressed air |
| Inconsistent Input | Software glitch or dirty sensor | Restart PS5, clean joystick |
| Severe, Constant Drift | Hardware failure (worn potentiometer) | Joystick module replacement or new controller |
If you’re still under warranty, contact Sony for a replacement. Otherwise, it might be time to start shopping for a new controller or a replacement joystick module.
Fixing Common Controller Problems
When your PS5 controller starts acting up, it can be super annoying. But don’t worry too much! There are some simple fixes for common issues that might pop up with your controller. Let’s get into it.
Drifting Joysticks
Okay, so drifting joysticks are a big pain. If you notice your character moving on its own, or the camera panning without you touching anything, that’s drift. Here’s what you can try:
- Cleaning: Use a can of compressed air to blow out any dust or debris around the base of the joystick. Sometimes, that’s all it takes.
- Recalibration: The PS5 has a built-in recalibration option in the settings. Give that a shot. It might help reset the joystick’s center point.
- Contact Cleaner: If air doesn’t work, try a tiny spritz of electronic contact cleaner. Be super careful not to use too much!
If none of these work, you might need to replace the joystick module. It sounds scary, but it’s doable with the right tools and a little patience. Check out some tutorials online before you replace joystick modules.
Fixing Trigger Buttons
Triggers feeling mushy or not responding? Here’s the deal:
- Check for Obstructions: Make sure nothing is physically blocking the trigger’s movement. Sometimes, a small piece of debris can get stuck.
- Clean the Trigger Area: Use a soft brush or cloth to clean around the trigger. Dust and grime can build up over time.
- Inspect the Spring: If you’re comfortable opening the controller, check the trigger spring. Make sure it’s properly seated and not damaged.
Addressing Button Responsiveness
Buttons not doing what they’re supposed to? Here’s a quick rundown:
- Clean the Buttons: Use a cotton swab and some isopropyl alcohol to clean around the edges of the buttons. Sticky residue can cause problems.
- Check the Button Contacts: If you’re feeling brave, open the controller and inspect the button contacts on the circuit board. Make sure they’re clean and making good contact.
- Firmware Update: Make sure your controller’s firmware is up to date. Sometimes, software glitches can cause button issues. You can update the controller’s firmware in the PS5 settings.
Disassembling Your PS5 Controller
 So, you’re ready to crack open your PS5 controller? It can seem daunting, but with a little patience, you can do it. Just remember to take your time and be gentle with the internal components. Let’s get started!
Step-by-Step Disassembly Guide
Okay, first things first, you’ll need to get those pesky screws out. They’re usually hidden, so take a good look around the back of the controller. Once you find them, use a screwdriver to carefully remove them. Don’t strip the screws! That’s a pain to deal with. After the screws are out, gently pry open the controller casing. A plastic prying tool is super helpful here. Be careful not to force anything. You don’t want to break any of the internal clips or damage any cables. Once you have the controller open, take a moment to familiarize yourself with the layout. Note where everything is connected. This will make reassembly much easier. Remember to slide the release button on the rear of the controller.
Tools Required for Disassembly
Having the right tools makes all the difference. Here’s what you’ll need:
- A small Phillips head screwdriver (PH00 size is usually best)
- A plastic prying tool (or spudger)
- A small container to keep screws organized
- Optional: A magnetic mat to prevent screws from rolling away
It’s a good idea to have a clean, well-lit workspace. This will help you see what you’re doing and prevent you from losing any small parts. Trust me, those tiny screws are easy to lose!
Tips for Safe Disassembly
Disassembling electronics can be tricky, so here are a few tips to keep in mind:
- Work on a clean, static-free surface. This will prevent damage to the controller’s internal components.
- Take pictures as you go. This will help you remember how everything goes back together.
- Don’t force anything. If something doesn’t want to come apart, double-check that you’ve removed all the screws and clips.
- Be careful with the ribbon cables. They’re fragile and can easily be damaged.
- Keep track of all the screws. Use a magnetic mat or small containers to keep them organized. Organization is key!
Repairing or Replacing Controller Parts
Sometimes, just cleaning or doing basic fixes isn’t enough. If something’s actually broken inside your PS5 DualSense controller, you’ll need to get your hands dirty and swap out some parts. Let’s get into it.
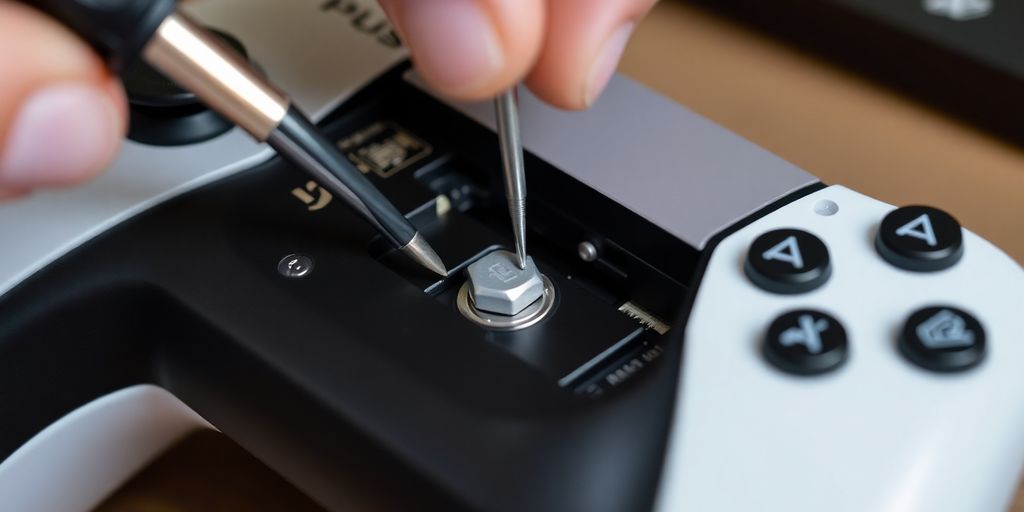
How to Replace Joystick Modules
Joystick drift is the worst, right? If your character is moving on its own, it’s probably time for a new joystick module. Here’s the deal:
- Get a new joystick module. Make sure it’s for the PS5 DualSense. I’ve heard good things about the Hall effect or TMR versions.
- Crack open the controller. Be gentle with the screwdriver; those screws are tiny.
- Unplug the old joystick. It should pop out with a little encouragement.
- Plug in the new one. Make sure it’s lined up right.
- Put the controller back together. Don’t forget any screws!
- Test it out! Make sure that drift is gone.
Fixing Trigger Mechanisms
Triggers feeling mushy? Maybe they’re not springing back like they should? Could be a broken spring or something stuck in there. You might need to replace the trigger entirely. It’s a bit fiddly, but doable. Just take pictures as you go so you remember how everything fits back together.
Cleaning Internal Components
Dust and grime can mess with the controller’s performance. A can of compressed air and some isopropyl alcohol can work wonders. Just be careful not to spray too much liquid directly onto the circuit board. Use a cotton swab dipped in alcohol to gently clean around the buttons and contacts.
I remember one time, my R2 button was sticking. I thought it was broken, but it turned out to be a tiny piece of a Dorito stuck inside. A quick clean, and it was good as new! Seriously, keep your snacks away from your controller.
Reassembling Your PS5 Controller
Okay, so you’ve taken your PS5 controller apart, fixed whatever needed fixing, and now it’s time to put it all back together. This part can be a little tricky, but if you take your time and pay attention to detail, you’ll be back to gaming in no time. I always find it helpful to have a clean workspace and maybe even take pictures during disassembly so you have something to refer back to. Let’s get started!
Step-by-Step Reassembly Guide
Alright, let’s get this controller back in one piece. Here’s a step-by-step guide to help you through the process:
- Start by placing the internal components back into the controller casing. Make sure everything sits flush and aligns properly. Don’t force anything; if it doesn’t fit easily, double-check the orientation.
- Carefully align the circuit board with the screw posts inside the controller housing. Gently press it into place, ensuring it’s seated correctly.
- Reattach any ribbon cables or connectors you disconnected during disassembly. Be gentle! These connectors can be fragile. A small spudger or plastic opening tool can be helpful here.
- Place the controller’s faceplate back on top, making sure all the buttons and joysticks are in their correct positions. Press down evenly to secure the faceplate in place. You should hear a few clicks as the clips engage.
- Finally, reinsert and tighten all the screws you removed earlier. Don’t overtighten them, as this could damage the plastic housing.
Ensuring Proper Alignment
Proper alignment is key to a functioning controller. If something feels off, don’t force it. Take it apart again and double-check that everything is in its correct position. Pay special attention to these areas:
- Button placement: Make sure all buttons move freely and aren’t obstructed.
- Joystick alignment: The joysticks should sit centered in their openings and move smoothly.
- Trigger alignment: The triggers should have a full range of motion and return to their resting position without sticking.
It’s a good idea to test the buttons and joysticks before you completely close up the controller. This way, if something isn’t working right, you can easily access the internal components and make adjustments.
Final Checks Before Testing
Before you get too excited and jump back into your game, there are a few final checks you should perform:
- Visually inspect the controller for any gaps or misalignments. The housing should be flush and secure all around.
- Gently shake the controller and listen for any loose parts rattling around inside. If you hear something, open it up and investigate.
- Make sure all the screws are tightened securely, but not overtightened. You want them snug, not stripped.
Now that you’ve reassembled your controller, it’s time to test it out and make sure everything is working as it should. Let’s move on to testing joystick functionality!
Testing Your Repaired PS5 Controller
Alright, you’ve gone through the whole process – disassembly, repair, and reassembly. Now comes the moment of truth: does your controller actually work? This section will guide you through thoroughly testing your repaired PS5 controller to ensure everything is functioning as it should. Let’s get started!
How to Test Joystick Functionality
First up, the joysticks. These are often the source of problems, so it’s important to give them a good workout. Connect your controller to your PS5 and boot up a game where you use the joysticks a lot, like an FPS or a racing game.
- Move each joystick in a full circle, paying attention to any dead zones or stick drift.
- Check if the in-game movement matches your stick movements precisely.
- Test the joystick buttons by pressing them down (L3/R3) to see if they register correctly.
Checking Button Responsiveness
Next, let’s make sure all the buttons are doing their job. Open a game or even just the PS5 menu and go through each button one by one.
- Press each button firmly and listen for a distinct click.
- Make sure the corresponding action happens on screen immediately.
- Pay special attention to the shoulder buttons (L1/R1, L2/R2) as these can sometimes be tricky.
Verifying Overall Performance
Now it’s time to put everything together and see how the controller performs in a real-world scenario. Play a game for at least 30 minutes, paying attention to how the controller feels in your hands and how responsive it is.
- Check the upcoming Xbox and PlayStation exclusives to see if your controller is ready for the challenge.
- Keep an eye out for any lag or disconnects, which could indicate a problem with the Bluetooth connection.
- If you notice any issues, don’t be afraid to go back and double-check your work. It’s better to catch problems early than to have them ruin your gaming experience later.
If everything seems to be working fine, congratulations! You’ve successfully repaired your PS5 controller. If not, don’t get discouraged. Sometimes it takes a few tries to get everything just right. Go back through the steps and see if you missed anything. Good luck, and happy gaming!
Wrapping It Up
So there you have it! Replacing the joystick on your PS5 controller isn’t as scary as it seems. With a little patience and the right tools, you can get your controller back in action. Just remember to keep everything organized while you work, and don’t rush through the steps. If you run into any issues, don’t hesitate to check back on the guide. And hey, regular maintenance can help prevent future problems, so keep that controller clean! Now, go ahead and enjoy your gaming sessions without any drift getting in the way!
Frequently Asked Questions
Why is my PS5 controller drifting?
Drifting happens when the joystick moves on its own without you touching it. This can be caused by dirt or wear on the joystick.
How do I know if I need to replace the joystick?
If cleaning the joystick doesn’t help and it continues to drift or not respond, it may be time to replace it.
What tools do I need to fix my PS5 controller?
You will need a small screwdriver, a plastic prying tool, and possibly some cleaning supplies like a microfiber cloth.
Can I fix my controller if it’s still under warranty?
If your controller is under warranty, it’s best to contact the manufacturer for a repair or replacement rather than trying to fix it yourself.
How can I prevent joystick drift in the future?
Keep your controller clean and avoid eating or drinking near it. Regular cleaning can help prevent dirt buildup.
Is it difficult to replace the joystick on my PS5 controller?
Replacing the joystick can be tricky if you’ve never done it before, but with careful instructions, it can be manageable.
About the Author: Elena Gillbert
Disclaimer
Techizta publishes content submitted by third-party agencies, partners, and clients. Any such posts are categorized and tagged accordingly:
- Sponsored Content: Posts labeled as "Sponsored" are paid placements submitted by third-party agencies or clients. Techizta does not endorse or express any views regarding the information contained in these posts. The opinions expressed belong solely to the respective authors and do not reflect the official policy or position of Techizta.
- Press Releases: Posts labeled as "Press Release" are paid PR submissions provided by our partners and clients. These are published as received and should be considered as promotional content.
The information provided in such posts is strictly for informational purposes only and should not be interpreted as buying recommendation, or professional advice. Techizta does not recommend, endorse, or promote any specific products, services, or companies mentioned. Readers are strongly encouraged to conduct independent research and consult with a qualified professional before making any decisions.
Additionally, all featured images accompanying such posts are intended as creative depictions of the subject matter. There is no intent to offend or misrepresent any individual, institution, or entity. If any content or imagery is found to be objectionable, please reach out to us at [email protected], and we will promptly review the concern.


Get Smart Insights In Inbox
Stay ahead of the curve with expert analysis and latest smart tech updates.